You can’t do much with PhonePad if you don’t add any users. Without users, you won’t have anyone to send phone messages to or receive phone messages from, so let’s go through the steps for adding users.
The first thing you need to do is run the PhonePad Admin module and log in using a PhonePad administrator account (you can’t login to PhonePad Admin using a non-admin account). PhonePad Admin should be located in your PhonePad folder.
A default administrator account is automatically created for you when you first install PhonePad:
Username: Admin
Password: admin
Login to PhonePad Admin using these login details, or if you have changed this or created a new administrator account then login using those details.
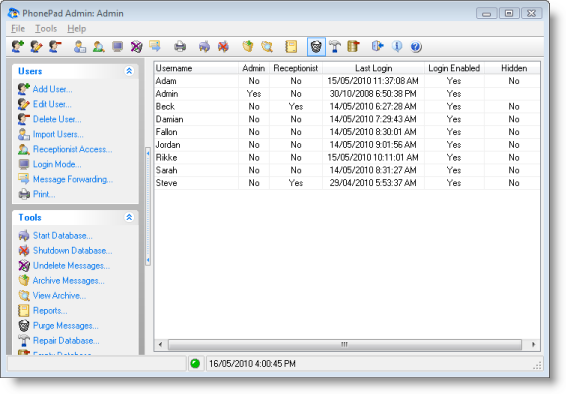
Once you have logged in, PhonePad Admin’s main screen displays a list of all users.
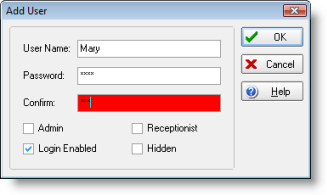
Adding a user is simple. Click on the Add User option in the sidebar on the left side of the window. The Add User window will be displayed.
 Enter a name for the user. You should make the name unique within PhonePad to avoid confusion.
Enter a password for the user in the Password and Confirm fields. The Confirm field will be highlighted in red if the two passwords don’t match.
Select the Admin checkbox if you want this user to be a PhonePad administrator.
Select the Receptionist checkbox if you want this user to be able to access other user’s Inboxes.
The Login Enabled checkbox should be checked unless you don’t want the user logging in. The Hidden checkbox can be checked to prevent a user from appearing in the To: field in phone messages and text messages, and therefore prevent other users from sending messages to that user.
Click OK and you have created your first PhonePad user. Rinse and repeat. 🙂

