Now that PhonePad has been installed we need to tell it where the PhonePad database is located. In the PhonePad folder you will find the DBConnect utility.
| 1. | Run DBConnect. |
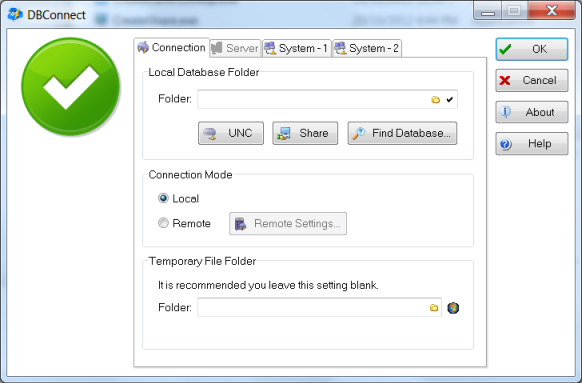
| 2. | Remember the network share we created earlier? This is where we use the shared path. Under Local Database Folder, enter the shared path under Folder. |
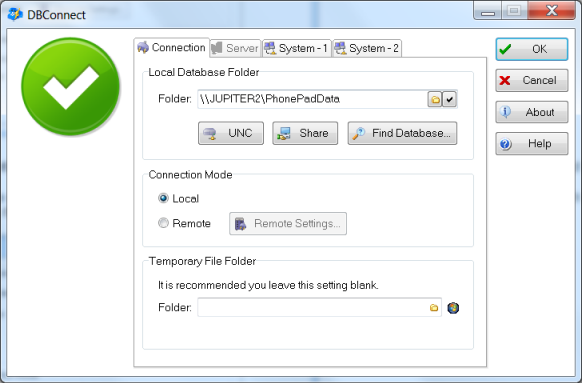
| 3. | Next to this field there is a small button with a check mark (or tick). Click this button. |
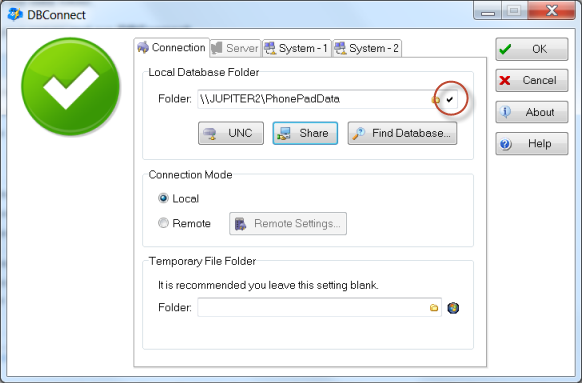
| 4. | DBConnect will perform some tests to make sure everything has been set up correctly. |
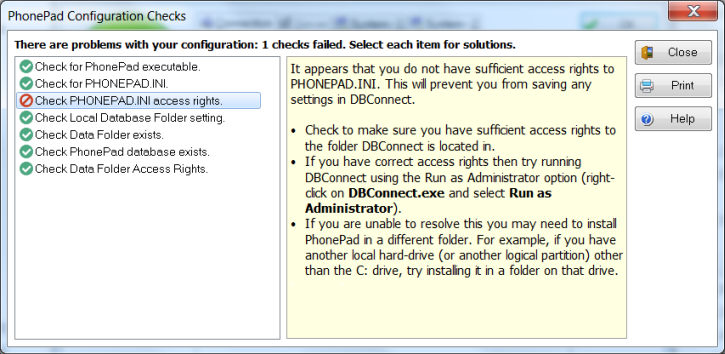
| 5. | All successful checks will have a green check mark or tick next to it. Any checks that failed will have a red circle with a line through it. Selecting a check will display information to on the right side of the window, with advice on how to fix the problem where the check failed. |
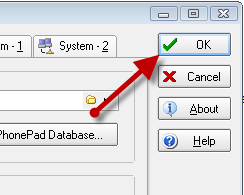
| 6. | Once you have all green ticks, you are all done. Click OK to save the settings. |
That's it. The workstation is now set up. Repeat these steps (Parts 1 and 2) for each workstation.