The post Importing Contacts into PhonePad. appeared first on Cybercom Software Blog.
]]>We have just published a brand new video that takes you through the steps of importing contacts using the latest import feature.

The post Importing Contacts into PhonePad. appeared first on Cybercom Software Blog.
]]>The post New Features in PhonePad 5.70.0. appeared first on Cybercom Software Blog.
]]>This is the first one (and hopefully not the last).

The post New Features in PhonePad 5.70.0. appeared first on Cybercom Software Blog.
]]>The post Updating PhonePad to a Newer Version. appeared first on Cybercom Software Blog.
]]>
The post Updating PhonePad to a Newer Version. appeared first on Cybercom Software Blog.
]]>The post Scheduling a Meeting in Appointment Calendar. appeared first on Cybercom Software Blog.
]]>
The post Scheduling a Meeting in Appointment Calendar. appeared first on Cybercom Software Blog.
]]>The post Connecting to the PhonePad 5 Server. appeared first on Cybercom Software Blog.
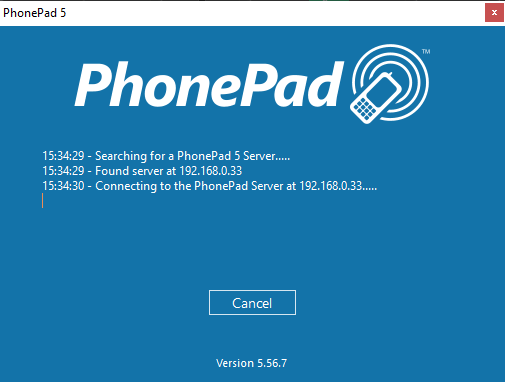
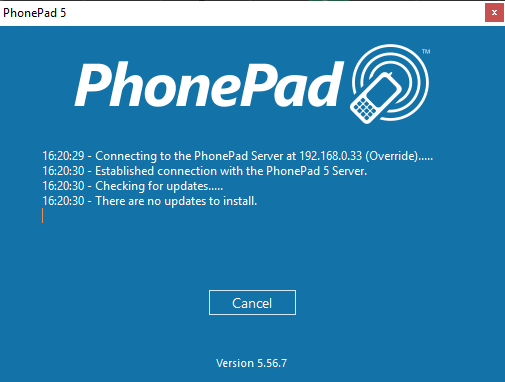
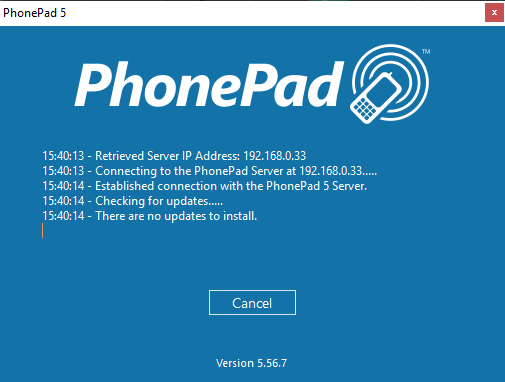
]]>When you start PhonePad, your PhonePad workstation software will send out a message asking if there are any PhonePad servers on the network. The server will respond with its connection details, which the workstation will use to establish a connection.
Here’s an example of that happening.
 If you find that PhonePad is unable to locate a server, or if you get an error message similar to this then something may be blocking the UDP protocol on your Server, workstation, or network.
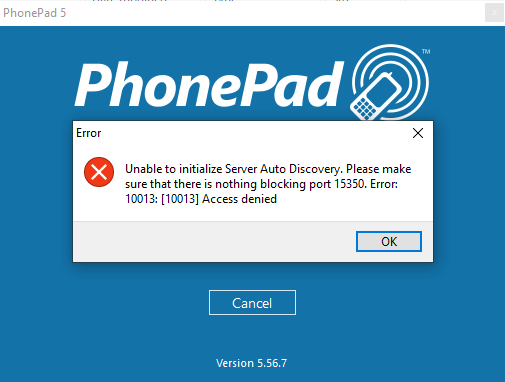 If this happens to you, check your anti-virus software on your Server and Workstations. Although PhonePad automatically creates the necessary firewall rules for the Windows Firewall, anti-virus software often ignores these settings. You may need to allow the PhonePad Workstation and Server software to access UDP and/or port 15350. Your router may also be blocking the UDP protocol or port 15350.
If you are unable to resolve this, there are a couple of other options you can use to connect.
Disable Auto-Discovery
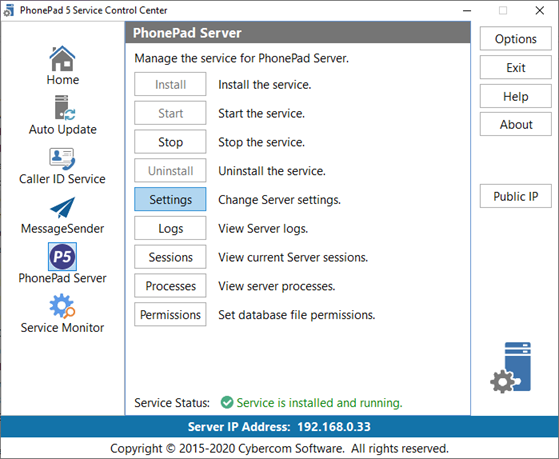
Open Control Center on the Server or Host PC to check the Server IP Address.
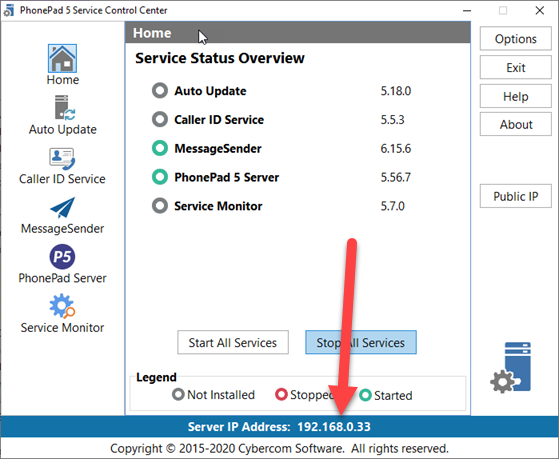 Make a note of the IP Address. Tip: If you double-click on the IP Address it will be copied to the Windows clipboard.
On your workstation, open Workstation Config.
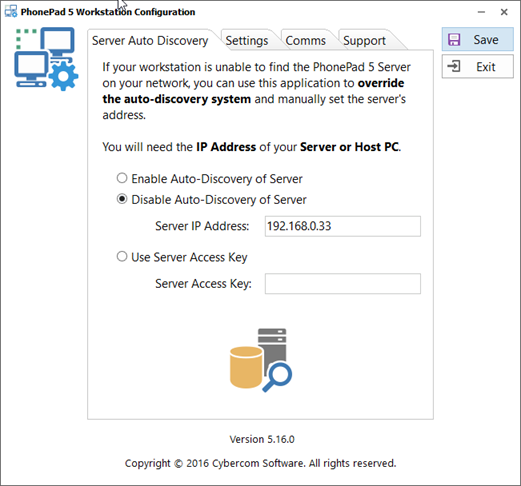 Select Disable Auto-Discovery of Server and enter the IP Address under Server IP Address, and then click Save.
When you start PhonePad, it will show that the IP Address is overridden.
 Server Access Key
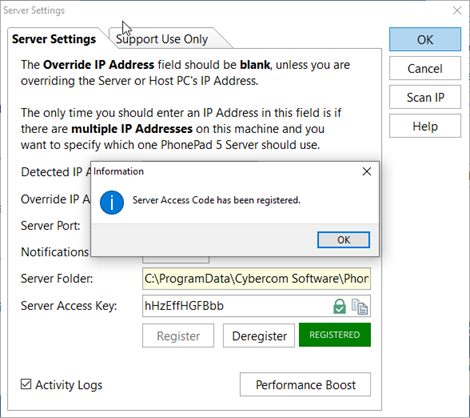
Open Control Center on the Server or Host PC, select PhonePad Server, and click the Settings button.
 When the Server Settings screen is displayed, you will need to create a Server Access Key.
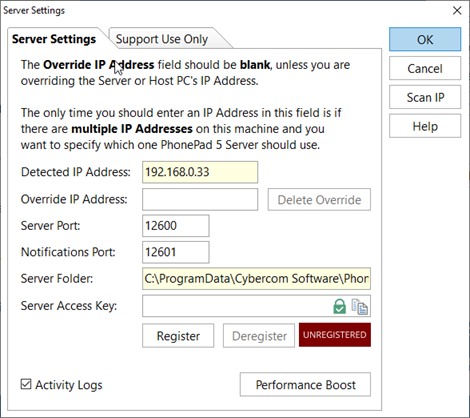 Click the button with the green padlock to create the Server Access Key.
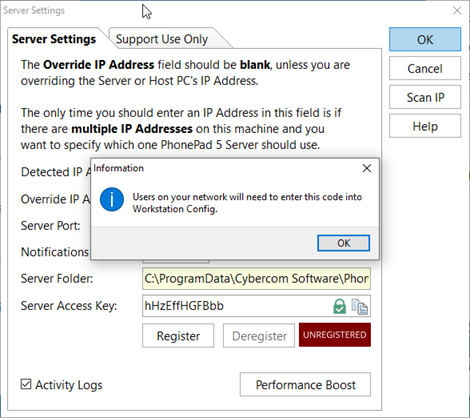 Copy the Server Access Key by clicking the Copy button (next to the button with the green padlock).
The Server Access Key needs to be registered. Click the Register button.
 On your workstation, open Workstation Config. Select Use Server Access Key and enter the Server Access Key that you created, then click Save.
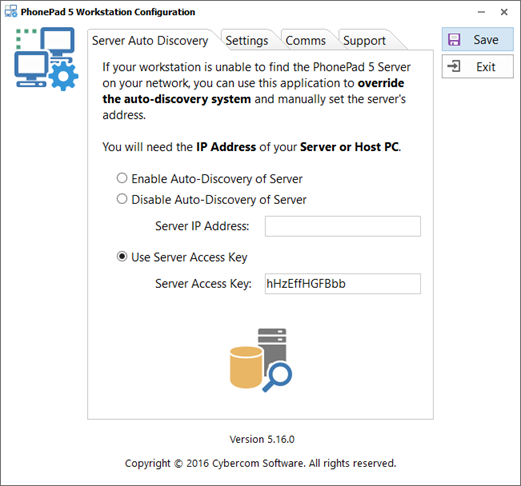 When you start PhonePad, it will retrieve the Server IP Address using the Server Access Key.
 Please note: This method uses the Internet to retrieve the IP Address from our web server. The Server Access Key will only work on your network and is useless outside of your network, which means it can’t be used to access PhonePad from a workstation outside of your network (unless you are using a VPN).
The post Connecting to the PhonePad 5 Server. appeared first on Cybercom Software Blog.
]]>The post New Video Tutorials. appeared first on Cybercom Software Blog.
]]>Our first step is the release of some video tutorials on our website under Learn/Video Training.
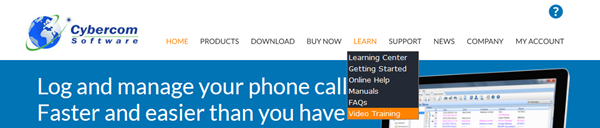
Scroll down and you will find a playlist for the currently available video tutorials. We will be adding to this list regularly so please check back often.

To view a video tutorial, simply select the tutorial from the playlist, then click the video above the list. A description of the tutorial and the length of the video are shown to the right of the playlist when you select one.
If there is a PhonePad feature (or features) you would like to see a video tutorial on, please email sales@cybercom-software and let us know. Our aim is to cover most, if not all, PhonePad features.
The post New Video Tutorials. appeared first on Cybercom Software Blog.
]]>The post Automatic Snapshots and How to Use Them. appeared first on Cybercom Software Blog.
]]>A snapshot contains all of your PhonePad program files and your database as it was before the update, allowing you to quickly revert to the pre-update state.
This feature is designed to get you back up and running again quickly in the event something goes wrong with the update.
Although this doesn’t happen very often there have been cases where files have not updated correctly and left PhonePad in a state where it couldn’t run, or it ran with errors. If this happens to you then follow these steps:
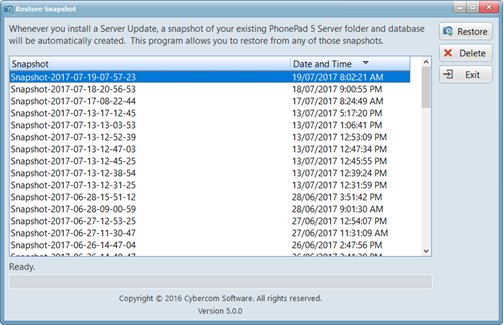
1. Run the RestoreSnapshot program on your Server or Host PC by right-clicking on the application and selecting Run as Administrator.
2. Select the snapshot you want to restore from. This would normally be the most recent one.
3. Click the Restore button.
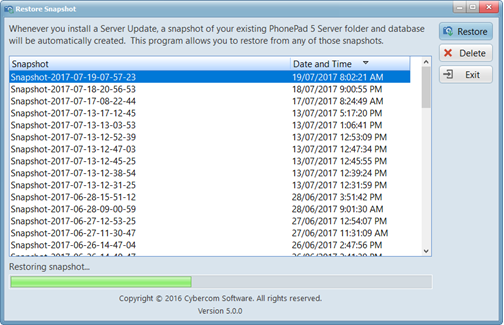
 4. When prompted to continue, click Yes.

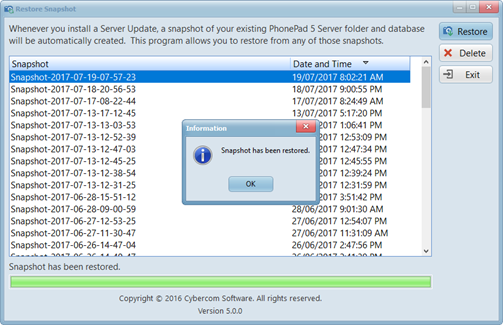
5. Your files will be restored from the snapshot.
6. After a couple of minutes your Server or Host PC should be back to the way it was.
7. Report the issue with the update to support@cybercom-software.com so that we can investigate and fix it.
If your workstations have already updated to the newer version of PhonePad, they will display a version error message when they start PhonePad.
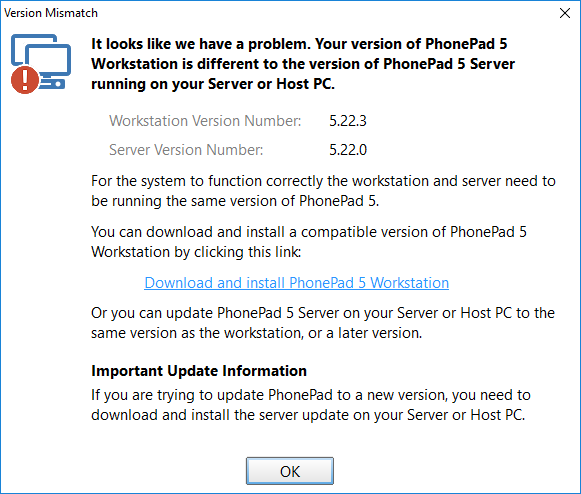
This is because you have restored your Server or Host PC to an earlier version of PhonePad 5 Server. You can easily fix this by clicking the link in the message. It will download the correct version of PhonePad 5 Workstation and install it on the workstation.
So remember, if you ever encounter issues with an update, you can quickly revert back to the previous version and get back up and running again. This will reduce any downtime and give us a chance to investigate the issue for you.
The post Automatic Snapshots and How to Use Them. appeared first on Cybercom Software Blog.
]]>The post Getting Rid of the “Open File – Security Warning”. appeared first on Cybercom Software Blog.
]]>Despite this, if you open PhonePad, or any of our other applications that are located on a network drive you may get a security warning message similar to this when you try to open it:
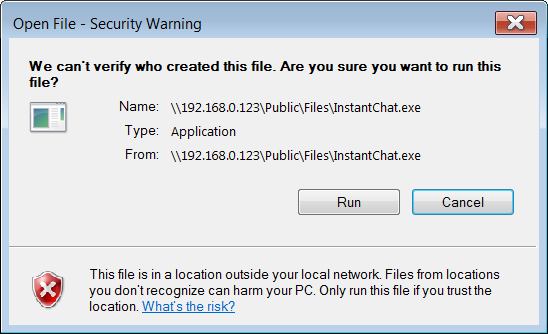
This can get annoying really quickly when you have to deal with this message every time you open/run the app. Fortunately, there is an easy way to get rid of it – permanently.
1. Open Control Panel.
2. Select Internet Options.
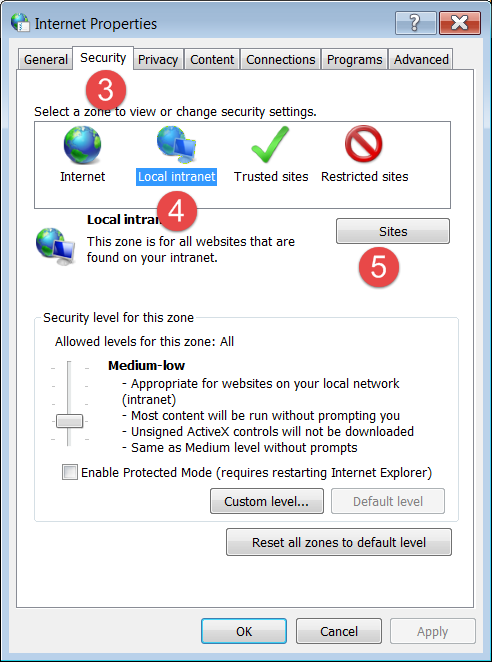
3. Click on the Security tab.
4. Select “Local Intranet”.
5. Click the Sites button.
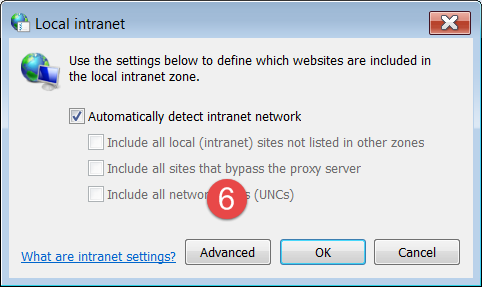
6. Click the Advanced button.
7. Enter the network path and click Add.
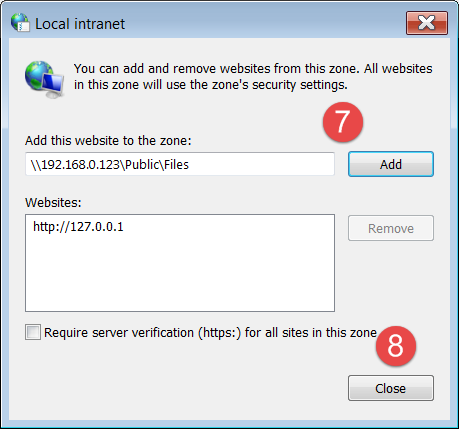
8. Click Close.
9. Click OK.
10. Click OK.
Now try opening any app in that folder. You should no longer get the message! End of frustration.
The post Getting Rid of the “Open File – Security Warning”. appeared first on Cybercom Software Blog.
]]>The post PhonePad Remote Mode Setup Guide appeared first on Cybercom Software Blog.
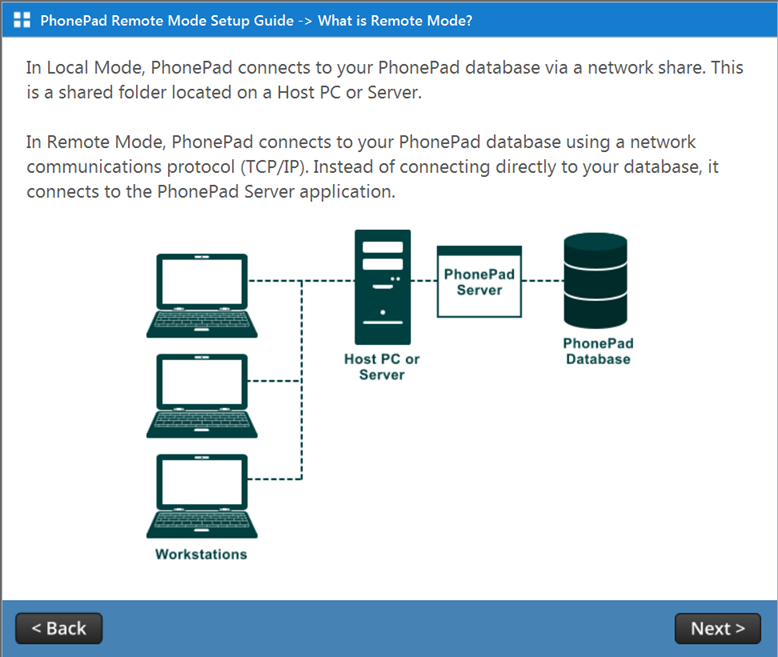
]]>This new guide shows you how to set PhonePad to operate in Remote Mode, also known as Client/Server.
Operating PhonePad in Remote Mode results in faster performance and less chance of data corruption.
You can access the new setup guide here.
The post PhonePad Remote Mode Setup Guide appeared first on Cybercom Software Blog.
]]>The post PhonePad Online Setup Guide Updated. appeared first on Cybercom Software Blog.
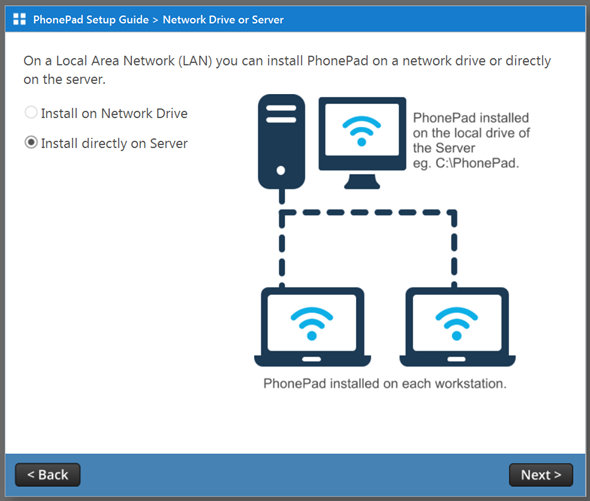
]]>The PhonePad installer was recently changed to make it much easier to install PhonePad. The online guide has now been updated to include these latest changes.
You can access the online guide here.
The post PhonePad Online Setup Guide Updated. appeared first on Cybercom Software Blog.
]]>