CSV Header Editor
When you have downloaded CSV Header Editor just run it - there is nothing to install.
Was Your CSV File Created by or Exported using Microsoft Excel?
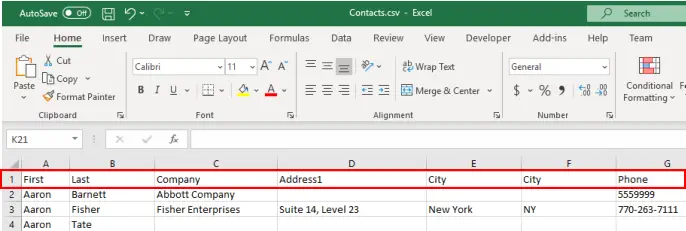
If your CSV file came from Excel then remove any rows that are not part of the data you want to import, especially anything above the row containing column names.Column Names
Your CSV files must contain column names as the first row in the file. If the file doesn’t have them then you need to add them, otherwise you will not be able to edit the columns in the CSV Header Editor program, and the PhonePad import process will not be able to import your contacts.
Products
PhonePad
•
Overview
•
Features
•
Why You Need PhonePad
•
Pricing
•
Licensing PhonePad
•
Upgrading from PhonePad 4
MessageSender
•
Licensing MessageSender
•
Setting Up MessageSender
Appointment Calendar


Copyright © 1995 - 2025 Cybercom Software. All rights reserved. Family Owned Business since 1995.
If you are trying to import contacts into the PhonePad Address Book but don’t have the correct field names in the
column headings then you will need to edit the field names.
To make this easier, we have created the CSV Header Editor. Yeah, not a great name but it does the job.
Let’s go through how you will use CSV Header Editor.
If you don’t have the CSV Header Editor, you can download it here.
Loading a CSV File
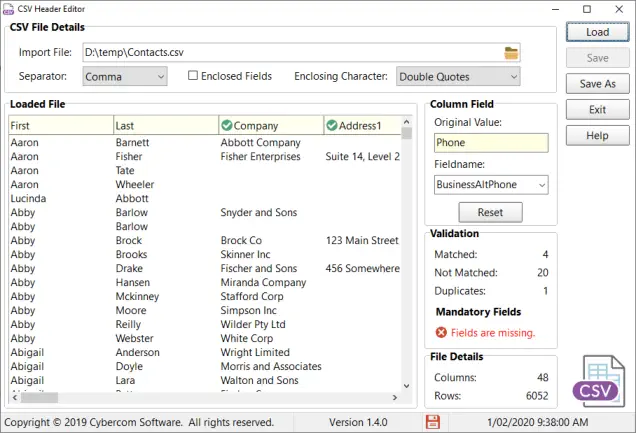
1. Select the file to load. 2. If necessary, select the appropriate Separator and Enclosing Character. 3. Click the Load button.Matching Column Fields
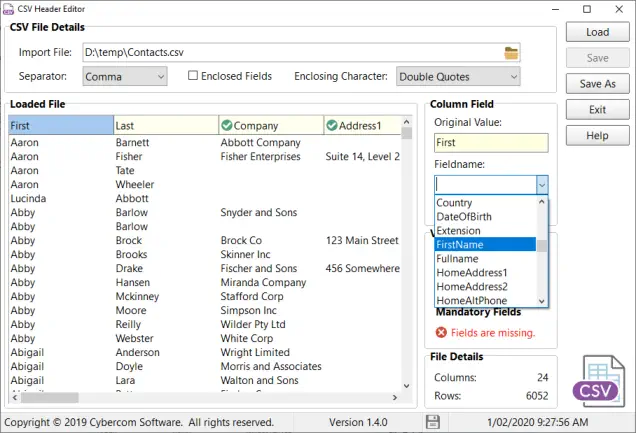
When the file is loaded, the program will try to match the column names with the required field names. Matched columns will be marked with a green tick (check mark). To set the correct field names for each column: 1. Select a column. 2. The selected column will be highlighted. 3. Select the correct field name from the drop-down list (you can also type in this list to find a field). 4. The column will be marked with a green tick (check mark). Columns that don’t have a matched field will not be imported when you import the file into PhonePad’s AddressBook.Duplicate Matches
If a field name has been used more than once, the duplicate columns with be marked by a red exclamation mark. These will need to be corrected.Resetting Columns
If you need to reset a column back to its original value: 1. Select a column. 2. The selected column will be highlighted. 3. Click the Reset button.Save Your Changes
Click the Save button to save the changes to the file you loaded. Click the Save As button to save the changes to another file.

Required Columns
So what columns are required for importing to PhonePad? These are the required column combinations: • Firstname, Lastname and one of the phone number fields. • Firstname, Lastname, Company and one of the phone number fields. • Fullname and one of the phone number fields. • Fullname, Company and one of the phone number fields. • Company and one of the phone number fields. Any one of these combinations is valid. We have seen some CSV files where the individual’s name and company name are both contained in one column, ie. there is no differentiation between individuals and organizations. If your CSV is like that, then go with the 5th combination above, ie. Company and one of the phone number fields.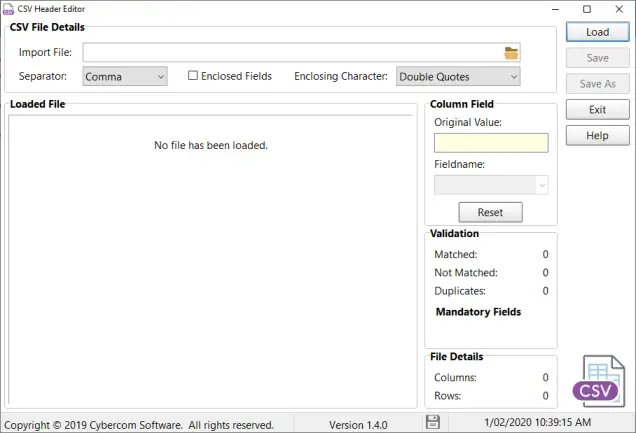
Excluding Columns
If there are columns in your CSV file that match the PhonePad fields but you don’t want to import them, then set them to NONE.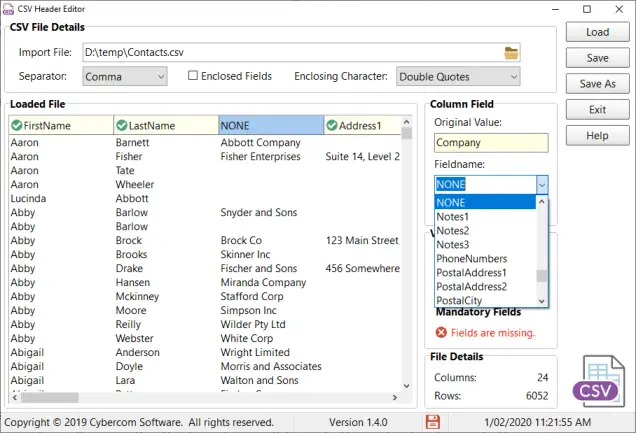
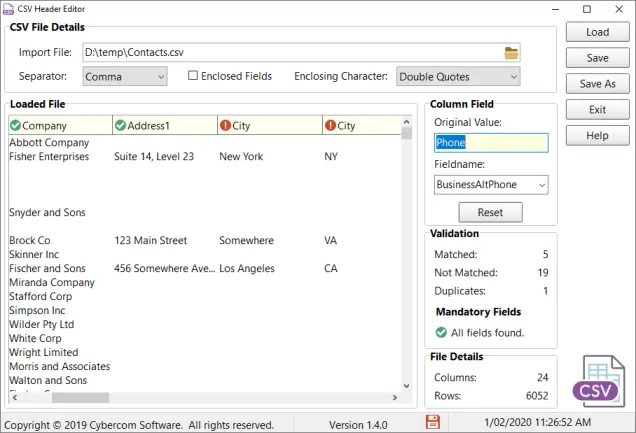
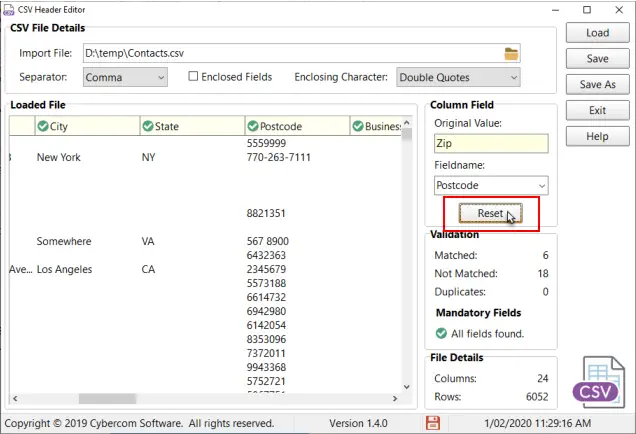
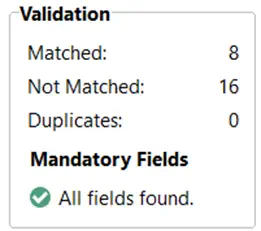
The status of matched fields is displayed the Validation area.
Not all columns need to be matched to fields, unless you want them imported. Fields
that aren’t matched will not be imported.
The Mandatory Fields indicator will display a green tick (check mark) if all mandatory
fields are present. If a red cross is displayed then your CSV file will fail to import into
PhonePad.

Problems?
If you have problems getting this working then please contact us at: support@cybercom-software.com We’re happy to help you get your contacts imported.CSV Header Editor


Copyright © 1995 - 2024 Cybercom Software. All rights
reserved. Family Owned Business since 1995.
When you have downloaded CSV Header Editor just run
it - there is nothing to install.
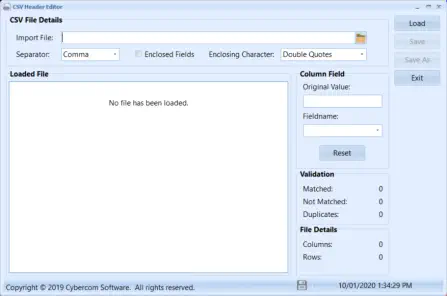
If you are trying to import contacts into the PhonePad
Address Book but don’t have the correct field names in
the column headings then you will need to edit the field
names.
To make this easier, we have created the CSV Header
Editor. Yeah, not a great name but it does the job.
If you don’t have the CSV Header Editor, you can
download it here.
Loading a CSV File
1. Select the file to load. 2. If necessary, select the appropriate Separator and Enclosing Character. 3. Click the Load button.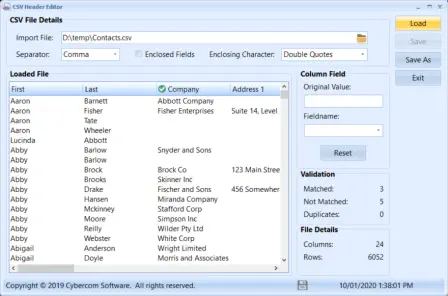
Matching Column Fields
When the file is loaded, the program will try to match the column names with the required field names. Matched columns will be marked with a green tick (check mark). To set the correct field names for each column: 1. Select a column. 2. The selected column will be marked by a blue arrow. 3. Select the correct field name from the drop-down list. 4. The column will be marked with a green tick (check mark). Columns that don’t have a matched field will not be imported when you import the file into PhonePad’s AddressBook.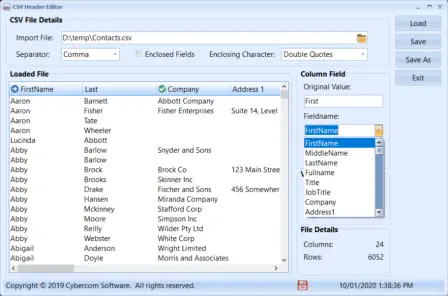
Duplicate Matches
If a field name has been used more than once, the offending columns with be marked by a red exclamation mark. These will need to be corrected.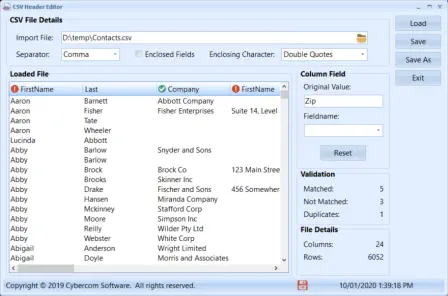
Resetting Columns
If you need to reset a column back to its original value: 1. Select a column. 2. The selected column will be marked by a blue arrow. 3. Click the Reset button.Save Your Changes
Click the Save button to save the changes to the file you loaded. Click the Save As button to save the changes to another file.Problems?
If you have problems getting this working then please contact us at: support@cybercom-software.com We’re happy to help you get your contacts imported.


